Rated 4.9 out of 5 on Trustpilot

5 Star Rated by Sailors

Trusted For 12 Years

Over 50,000+ Orders Shipped

90 Day Risk Free Returns

Price Match Promise

Fast Dispatch and a 5 Star Rated Service You Can Count On
Shop our January Clearance Items

November 11, 2022 3 min read

How to Build a Laser 6-1 Outhaul System 


The Laser 6-1 Outhaul System is now the standard that comes with all new boats. If you are finding your outhaul is very difficult to adjust it may be time to upgrade your system.

In this article, we walk you through what you'll need and how to make a Laser 6-1 Outhaul System step by step.

Items You Will Need

You can also buy the full Laser Outhaul Kit on our website. 

Some ropes will need to be cut to your correct length once the system is made. This system is tied together with knots however, we would always recommend when working with Dyneema lines to splice them as this is stronger than knots.

Step 1

Clew Block

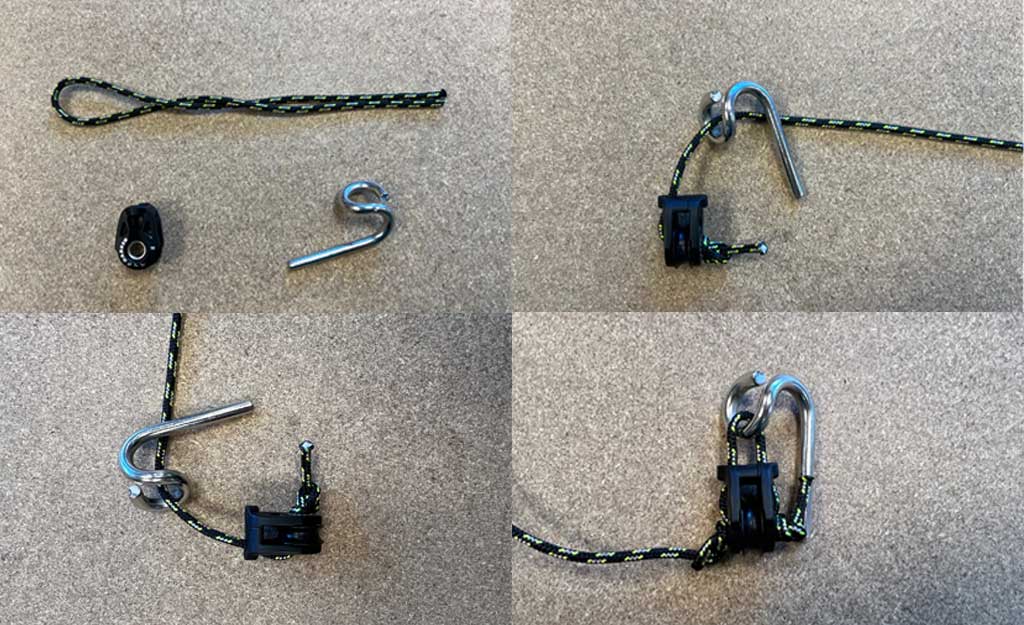
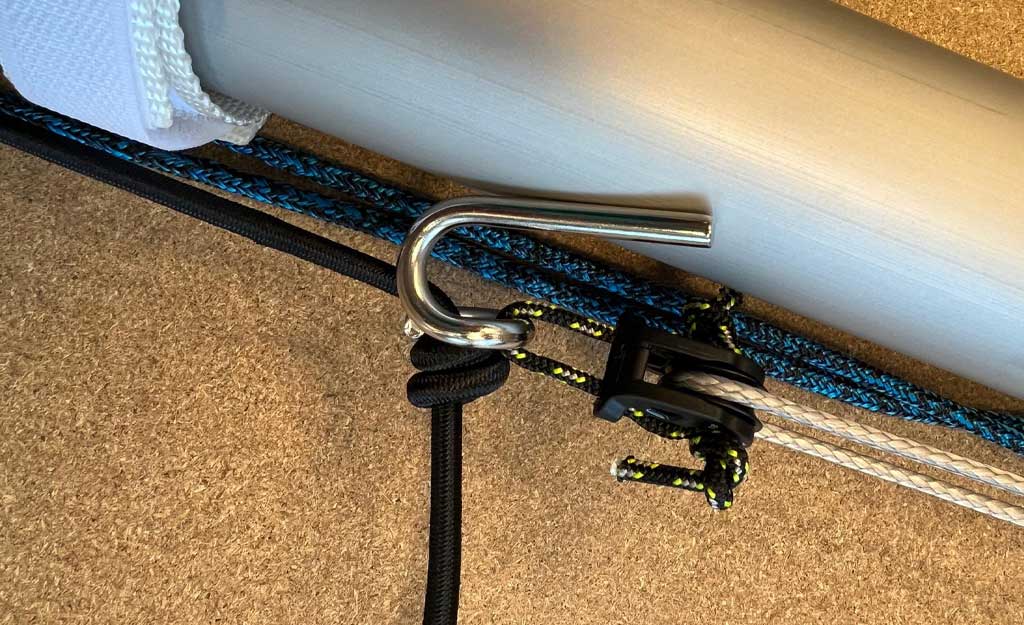
The first part of the Outhaul System is going to be the clew block and hook. There are lots of different ways that people rig this. We will do it per the instructions you receive with a new boat. Take one of the 18mm blocks, the clew hook and one length of the 3mm race rope. 

Tie a stopper knot in one end of the line and thread it through the centre of the block and up through the top of the block. Now grab your clew hook and thread the line through and back down into the top of the block. Lastly back through the middle of the block and tie another figure of 8.

Laser 6-1 Outhaul System - Clew Block

Step 2

Primary Dyneema

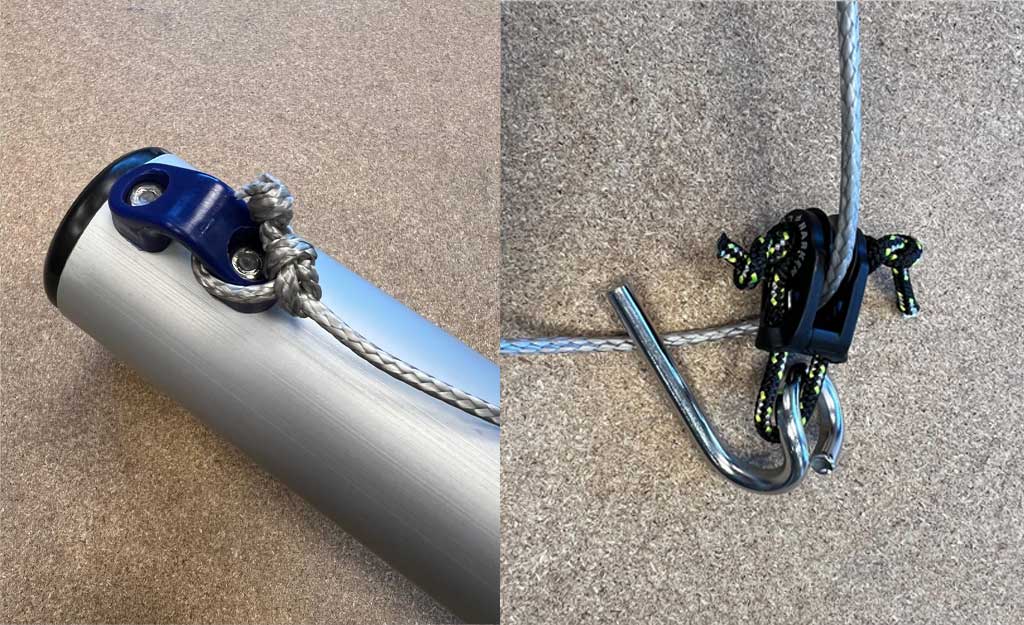
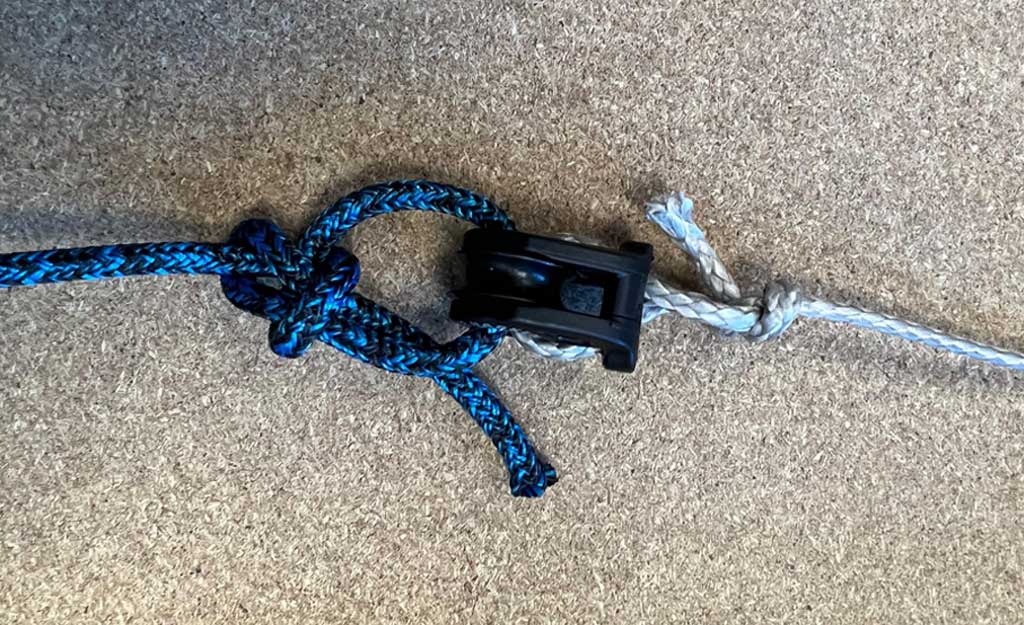
Take your length of 3mm Dyneema and tie a bowline around the eye on the boom end. 

Now thread your line through the clew block from step one and the Dyneema back through the boom eye. The rope will then run along the boom towards the front of the boat.

Laser 6-1 Outhaul System Boom End
Laser 6-1 Outhaul System Boom End Complete

Step 3

Control line

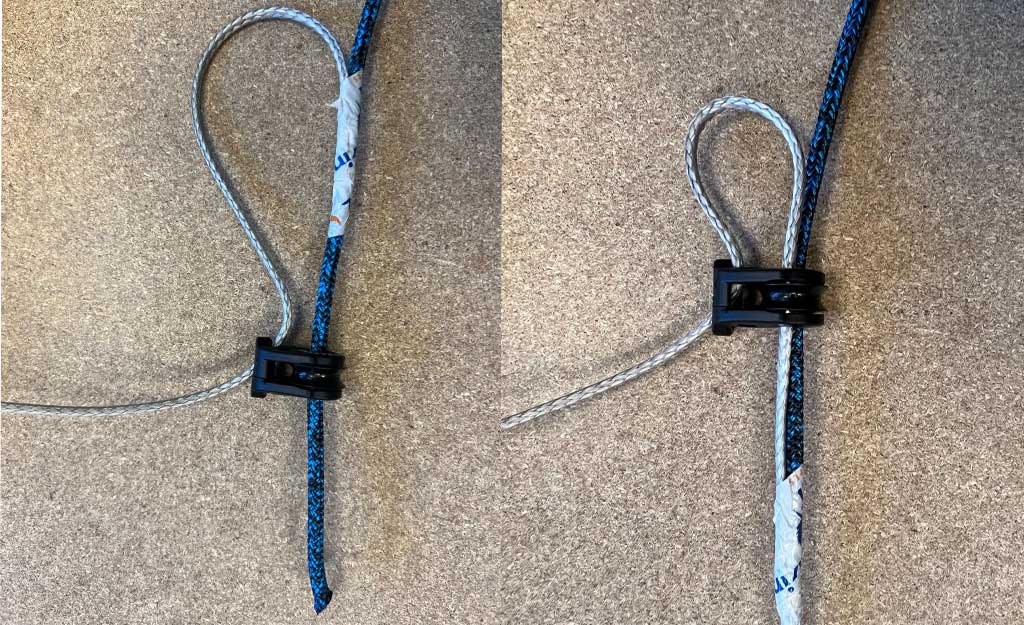
Take your 4mm Race rope and an 18mm block. Thread the 4mm line about 3 inches through the centre of the block. 

Now with the Primary Dyneema thread it into the top of the same 18mm and tape both lines together using the photo below as a reference.

Laser 6-1 Outhaul System - Control Block

Pull both through and tie a bowline in each.

Laser 6-1 Outhaul System - Control Block Complete

Step 4

Mid Block

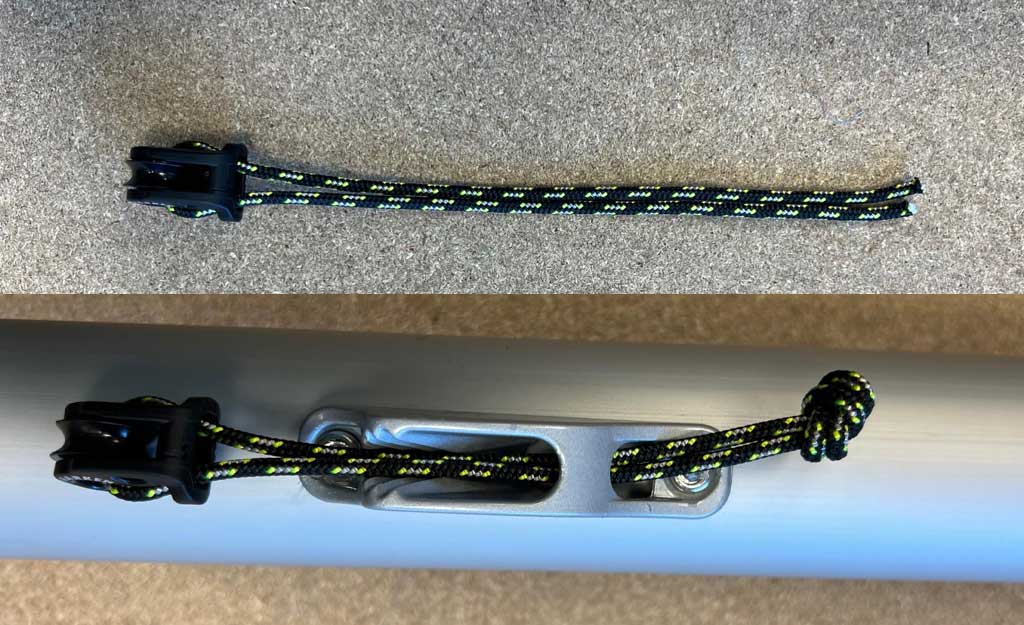
Take your next 18mm block and a length of 3mm race rope and tie it into the cleat on the boom. This should face backwards down the boom towards the back of the boat.

Laser 6-1 Outhaul System - Mid Block


Laser 6-1 Outhaul System

Step 5

Control line  

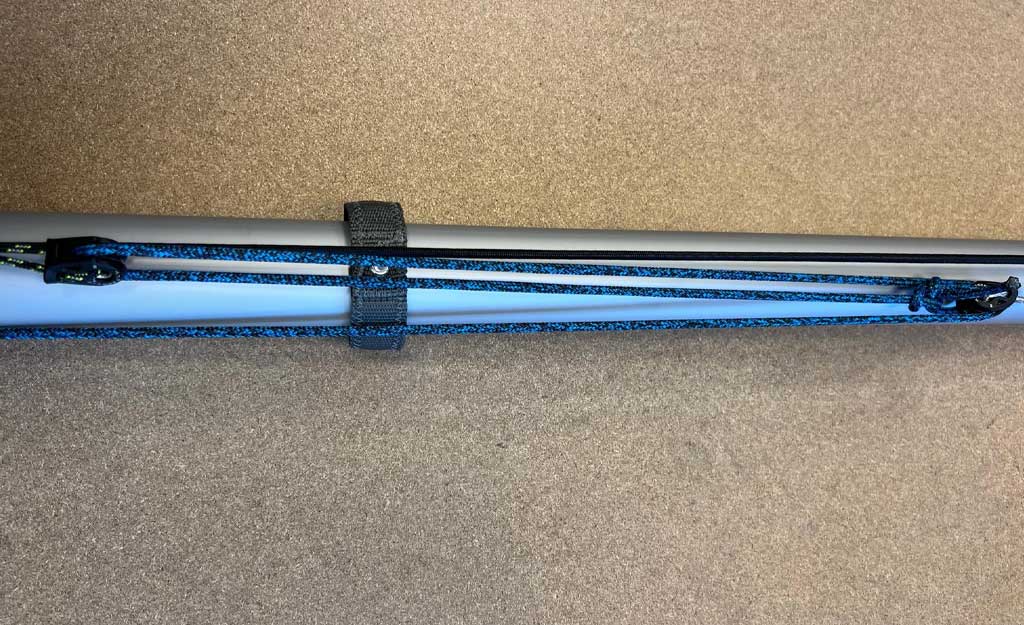
Now thread the control line from the bowline you have tied through the mid-block tied to the boom and back through the block the bowline is tied onto going around the sheave. This will create your 6 to 1 purchase.

Laser 6-1 Outhaul System Complete


Step 6

Mast Block

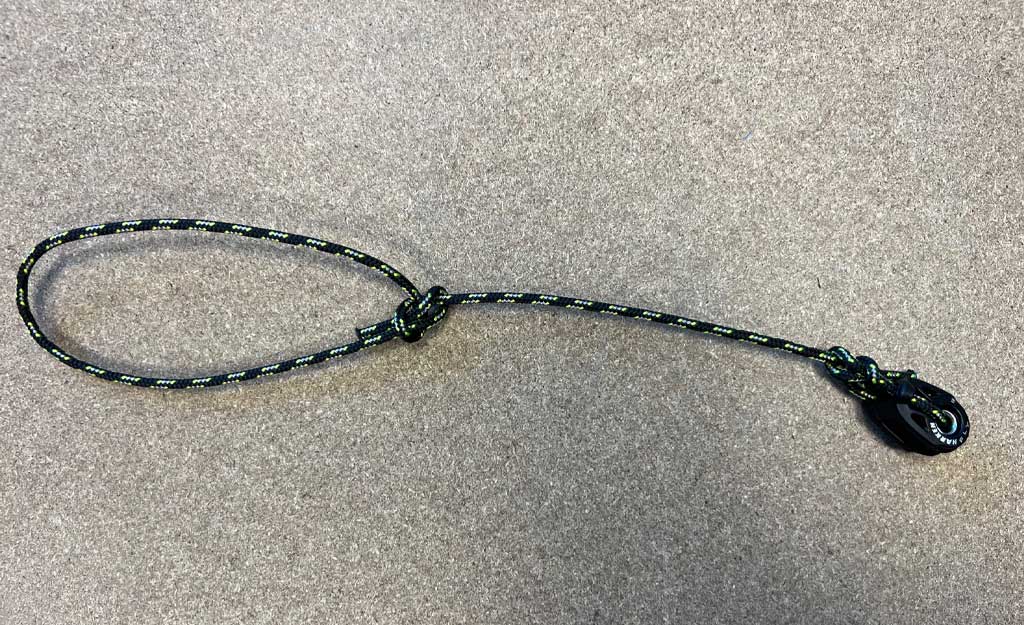
Take your last 18mm block and 3mm race top and tie a bowline around the block and the loose end will be tied around the lower mast where the boom and mast meet. This block acts as the turning point where the control line rope goes along the boom and down towards the deck plate.

The control line rope will then go through the deck block at the bottom of the mast and backwards through the cleats on the deck.

Laser 6-1 Outhaul System - Lower Mast Block


Step 7

Elastic/ Shockcord

Thread the shockcord through the cleat on the top of the boom then tie a stopper knot. Now the other end can be tied to the sail or the clew hook as shown below.

Laser 6-1 Outhaul System

Questions?

If you have any questions on the Laser 6 to 1 outhaul system please get in touch with our team who are always happy to help.